
Welcome to Paria's “Hike of the Week” series. Seeing pictures of a great trail is one thing. Experiencing it for yourself is a whole other level! Each week, we hope to inspire you to get out and see some of the world's best backpacking locations for yourself!
This week's spotlight is on the famous Tour du Mont Blanc in Europe.
Featured photo: Mont Blanc (photo by David)
Why This Hike?
The Tour du Mont Blanc circumnavigates the Mont Blanc Massif. Mont Blanc itself is one of the highest mountains in Europe at 15,777 feet. The trail passes through three countries: France, Italy, and Switzerland. It delivers everything and more you'd expect from the Alps. The Tour is truly a bucket list trek with some of the most breathtaking alpine country you'll ever see.
- Length: 96 miles (155 km)
- Type: Loop
- Difficulty: Challenging
- Elevation change/gain: 6 miles
- Best time to visit: July-September (August and September are less crowded and you'll have less worry of lingering snow.)
- Although you'll be in alpine territory, the trail doesn't travel so high that you should have to worry about altitude sickness. (It gets a little over 8,000 feet at the highest points.)
- You can do the trail either way, of course. But, it is traditionally done counter-clockwise. If you're looking for more solitude, consider hiking clockwise.
- You can do the trail yourself with a lot of research, a quality map, and good navigational skills. Or, you can go with a guided tour.
- Like many long trails, hiking times can vary a lot. To truly enjoy it, plan on taking at least 11 days.
- General highlights: beautiful blue lakes, glaciers, mountain passes, rolling meadows, and rushing rivers
- Specific highlights: Col de la Seigne, Mont Blanc, Grand Col Ferret, Val Veni, and Vallee Blanche. Keep in mind that these are just a few! You'll never have a day that is just “meh”.
- The Tour du Mont Blanc passes through 17 towns and lots of smaller villages. Between this and many huts along the trail, you'll have plenty of places to bed down. (Or you can tent camp.) Having lots of villages and lodging options means you don't need to be an expert backpacker to do this trail. Plus, you won't have to carry as much if you're stopping off in the towns. You can even drop some supplies off for yourself ahead of time. Finally, you can't beat the cultural experience and local food!
- If you want to save some money, there are some free tent camping areas along the trail.
- You will meet people from all over the world on the trail. This can make for some fun and interesting conversations at the refuges in the evenings!
Before you pack your bags and buy your plane tickets, keep the following in mind:
- There are some sections with ladders and metal stairs that can be “vertigo-inducing”. Fortunately, there are some alternative routes for some of these and areas that may still be snow-covered.
- Avoid snow bridges! They won't last forever and you may be the person who finds out the hard way when it's seen its final days. These types of accidents happen every year on the trail.
- Come prepared for all kinds of weather, including storms, snow, and wind.
How Do I Get There?
This one is a little different than most of our HOTW directions. Instead of driving yourself after landing at Geneva Airport, you'll take a train or shuttle from there to Les Houches. We've included some suggestions in the Resources section below. If you're curious, the drive time is about 1 hour and 20 minutes.
Map of Recommended Route
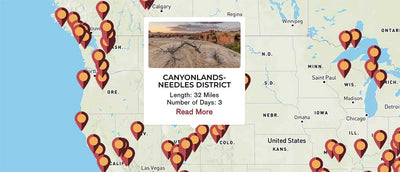
The following map outlines our recommended route. Click the "Load Interactive Map" button to load the correct map. Once loaded, you can navigate along the route and view recommended campsites.
For even more detailed mapping, including being able to print a copy for yourself, click the "Open in CalTopo" button at the top of the map once it's loaded into view.
- Day 1 - Les Houches to Les Contamines (11 miles)
- Day 2 - Les Contamines to Les Chapieux (11 miles)
- Day 3 - Les Chapieux to Rifugio Elisabetta (8 miles)
- Day 4 - Rifugio Elisabetta to Courmayeur (9 miles)
- Day 5 - Courmayeur to Rifugio Bonatti (7.5 miles)
- Day 6 - Rifugio Bonatti to La Fouly (11 miles)
- Day 7 - La Fouly to Champex (9 miles)
- Day 8 - Champex to Le Peuty (9 miles)
- Day 9 - Le Peuty to Tre-le-Champ (7 miles)
- Day 10 - Tre-le-Champ to Lac Blanc (4 miles)
- Day 11 - La Flegere to Chamonix (7 miles + 1.75 miles down the tram)
Trail Description
Day 1 - Les Houches to Les Contamines
You can shave off some time right away by taking a cable car to Col de Voza, but where's the fun in that? Start the day on a gradual climb toward the col, which is one of the many highlights of the trail. From here you'll head toward Col du Tricot and see Bionnassay Glacier. Eventually, you come to a swing bridge over a stream. (It's pretty high, so try not to let your fear of heights or vertigo get the best of you!)
Head further through the trees. The views are rewarding once you get above the treeline. But, this is shortly followed by a steep descent toward Refuge de Miage. Past here, the views of Domes de Miage valley are wonderful. If you want or have time, you can take a side trip to the summit of Le Truc. Most of the rest of the route to Les Contamines is forested. Take your pick of the accommodations there.
Day 2 - Les Contamines to Les Chapieux
Your second day starts with some road walking. Past Notre-Dame de la Gorge, the trail gets steeper, but the views open up too. You'll level off for a while once you reach the meadow filled with beautiful wildflowers in late spring/early summer. If you're ready for a break, Refuge Nant Borrant is a good stop.
The trail gets a bit more winding and steep from here, meandering through the valleys. You'll finally see Col du Bonhomme after making it around Aiguilles de la Pennaz. This and Col de la Croix du Bonhomme are both stunning places to take a well-deserved break. There are two different ways you can go from here. Make sure to follow the signs for Les Chapieux. You'll notice more and more pastures as you near the town. It's noted for having more bovine residents than human ones.
Day 3 - Les Chapieux to Rifugio Elisabetta
Unfortunately, the first part of the day begins on the road again. (It eventually becomes dirt after passing by Seloge.) From here, the Aiguille des Glaciers towers above the valley. You'll probably want to take a break at Ville des Glaciers or Les Mottets before heading up the steep trail to Col de la Seigne. You're now passing into Italy!
Take your time enjoying the sights since it's not much further to Rifugio Elisabetta. (And it's one of the trip's shorter days.) The path widens and is an easy hike down to your stop for the night.
Day 4 - Rifiguio Elisabetta to Courmayeur
Be sure to get up early and enjoy the sunrise from arguably one of the prettiest views a refuge has along this route. Plus, since the trail is exposed here, you'll want to get going asap before the sun gets too hot!
Like much of the trail, you have two options today. Near Lago de Miage, you can continue on the main path or take the Val Veni route. Both will take you to Courmayeur, though the latter in a much more roundabout way. Taking the “high road”, you'll climb up to Mont Favre Spur. You'll be glad you took this route because it affords some of the best views in Italy and arguably the whole trail.
The trail descends for a while past here as you head towards Rifugio Maison Vieille at Col Checrouit. The views of Mont Blanc and the surrounding mountains continue to impress. The alpine lakes are a nice touch too. You'll notice several ski areas as you approach Dolonne. You'll also know you're close because the trail becomes very precipitous (switchbacks included).
If you want something a little more laid-back, you can lodge in Dolonne for the night. If you want all the amenities and to fully immerse yourself in the wonderful Italian mountain culture, head over the river into Courmayeur. Travelers like this town so much that many choose to take a day off here.
Day 5 - Courmayeur to Rifiguio Bonatti
We know we keep saying it, but this stage boasts some of the best views of the Tour too. In other words, make sure your camera is juiced up! Whether you stayed one night or two, hopefully you are rested up because the climb is brutal right away today. Take a much-needed break at Rifugio Bertone and take a look back at where you came from in Courmayeur.
Just past the refuge, you have the option to take the “high road” again or stay on the main trail (less strenuous). That doesn't mean the views aren't still amazing. Glaciers and large rock walls dot Val Ferret as it makes its way towards Grand Jorasses. The views are so open here you'll still be able to see Val Veni all the way to Col Grand Ferret ahead of you. The open meadows up here are absolutely spectacular in the summertime too.
When you reach a short, but steep, climb, you'll know you're almost to your destination for the night: Rifugio Bonatti. You'll love the solitude here after staying in the bustling Courmayeur.
Day 6 - Rifiguio Bonatti to La Fouly
Luckily, day 6 doesn't start with any precipitous inclines. Enjoy the relatively leisurely hike before descending into Val Ferret. Past here, things do get a little steep as you head through wildflower meadows towards Rifugio Elena. It will be a welcome rest stop before the next part of the trail: surmounting Grand Col Ferret. You will be rewarded with your first views of Switzerland, though.
Fortunately, the descent down the other side of the col is much more forgiving than the ascent. Once you reach La Peule, the trail splits again. We've opted to stay on the main trail. Both meet up again in Ferret. From there, you'll head back into the woods and hike near the river quite a bit until you reach La Fouly.
Day 7 - La Fouly to Champex
If you're starting to feel the effects of being on the trail for so long, take solace in the fact that day 7 is said to be the easiest. Head out of town and across the river. You'll be spending about half of the day near the river and, luckily if you've gotten some sunburn, in the forest. There are some views here and there, though. Keep a lookout for the Torrent du Treutse waterfall.
Much of your day will be spent winding in and out of little hamlets along the trail. This means you'll find plenty of good spots to take a break. The climb to Champex can seem worse than it really is after your easy day so far. Hopefully, the unique wood carvings scattered throughout the forest will take your mind off of it. Walk past the beautiful Lac de Champex on the way to your lodging for the evening.
Day 8 - Champex to Le Peuty
You have, yet again, several options for today. None of which will be a walk in the park. The variant is much more strenuous, but will also take you to the highest point on the TMB. Be sure to consider not only how you're feeling physically by this point, but what the weather is up to as well.
The main trail meanders along the ridgeline extending from Pointe d'Orny. You'll pass through more small hamlets today. Stop off in Bovine for a break before heading down to Refuge Le Peuty.
If you head up the trail further, you will find Trient and Col de la Forclaz, other popular rest stops for the night. Staying at Refuge Le Peuty gives you the least amount of backtracking, though.
Day 9 - Le Peuty to Tre-le-Champ
If you haven't gotten your fill of switchbacks yet, you will fill your quota today. Day 9 starts with a steep climb up switchbacks towards Col de Balme. You'll eventually make your way out of the trees to enjoy the views of the valley you came from. A few more switchbacks and you'll finally reach the top of the col. The views of Mont Blanc and Aiguille Verte are particularly spectacular here. Plus, this marks your passage back into France!
From here, head down the mountain. You can opt to take a tram to the valley below if you like. The trail is a bit steep at first, but eventually levels out as you near Le Tour. From here, Argentiere is a little less than 2 miles away.
Argentiere is a popular spot to spend the night. It's nice if you're looking for something with more amenities. But, we recommend staying at Tre-le-Champ if you plan on heading to Lac Blanc the next day.
Day 10 - Tre-le-Champ to Lac Blanc
More options greet you today: doing the infamous ladders section (main path) or taking the variant with lots of switchbacks. You also have the option of heading to Lac Blanc for the night or beelining it toward La Flegere. Lac Blanc is absolutely breathtaking and it's your last night on the trail. Might as well go out with a bang!
However, we did decide to go with the “easier” route along the balcony trail for this article. If you take this way, you're in for lots of switchbacks, as we said, but some amazing views!
Another great part of today is that you can sleep in. Take your time and enjoy that cup of coffee because you only have a few miles to go to Lac Blanc. And you won't mind spending extra time soaking in the views there before your journey's end.
Day 11 - Lac Blanc to Chamonix
Begin the end by heading down to La Flegere. Enjoy the views of the Mer du Glace Glacier, Mont Blanc, and Grand Jorasses on the way. You might think the trail would be all downhill today, but you'd be wrong. The hard climb up Col du Brevent will award you with a switch of mountains. Instead of Mont Blanc taking center stage, now you'll be able to see the mountains that have been behind you for days. Not only that, but you can literally see where you've come full circle over the past 11 days. From here, it's a short hike to the cable car station. You can glide down to Chamonix and avoid hiking the steep descent back into Les Houches. (Don't worry. You're not missing out on any scenery you haven't already seen!)
What Do I Need?
If you'll be hut hopping, you won't need nearly as much gear as normal. For starters, you won't need to worry about a tent. We still recommend bringing your own sleeping bag. It serves as a blanket and sheet cover all in one for this trip.
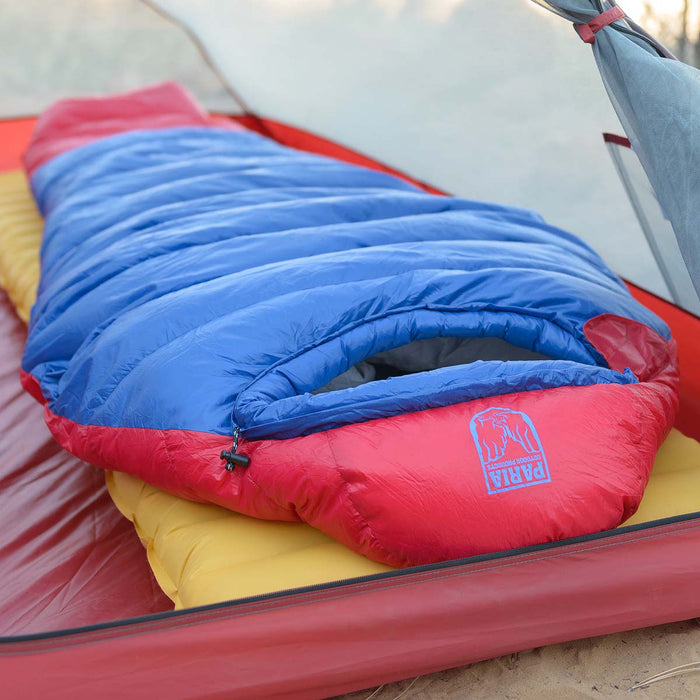
The Thermodown 15 Sleeping Bag is rated for 15 degrees, which makes it a great option for the chilly mountain temps on the Tour du Mont Blanc.
Speaking of which, bring your own down camp pillow too. It's nice to have your own and they weigh next to nothing in your pack. If you decide to “rough it”, invest in a durable, but lightweight backpacking tent to save even more on pack weight. For such a long trek, you'll want to save weight wherever you can!
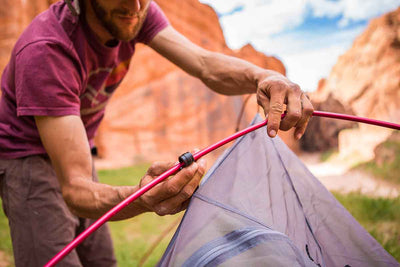
You definitely don't want to forget the trekking poles for this trip. Be sure to have some extra snow baskets for them too. You might want an easy-peasy inflatable sit pad for your breaks. This can help your hike be a more relaxing one.
In chilly, mountainous regions, it can be easy to forget the sun protection...but don't! Be sure to pack some sunglasses and your favorite sunscreen to protect your whole body. (That snow glare can be really rough on the eyes!)
If there's anything else you need to complete your pack, visit our full line of high-quality, affordable backpacking gear.
Shop Backpacking Tents
Shop Ultralight Tarps
Shop Backpacking Quilts
Shop Down Sleeping Bags
Shop Insulated Sleeping Pads
Shop Backpacking Pillow
Shop Folding Trekking Poles
Shop Titanium Cookware
Shop Tent and Tarp Accessories
Finally, to make sure you don't forget something at home, use our Ultimate Backpacker's Packing List. It even includes a convenient printable checklist!
Do I Need a Permit?
No permits are needed for the Tour du Mont Blanc. However, you will want to book your stays at refuges as far in advance as possible. This will help ensure you get the itinerary you're looking for and not have some days that are extra long.
Resources
Tour du Mont Blanc Hike
Transportation Options
Conclusion
If you're looking for one of the most spectacular hikes in the world, make plans to hike the Tour du Mont Blanc one day!
Have you completed this epic trek? We'd love to hear about your experience in the comments section below!
Read Next
If you're looking for more hike ideas, read our “Best Backpacking Trips for Your Bucket List” round-up post. Also, the following Hike of the Week articles cover other great trails around the world.
Hike of the Week: The O Circuit in Torres del Paine
Hike of the Week: Kepler Track
Hike of the Week: Milford Track
For even more amazing backpacking trips, visit The Trailhead, our interactive hike map. It contains a curated list of dozens of hikes, each with a detailed write-up like this one.

Finally, check out our comprehensive list of backpacking articles that cover just about everything there is to know about backpacking. If you're just starting out, our Backpacking 101 section covers all the basics. If you already have a few trips under your belt, you can find more advanced topics covered in our Expert Articles.


Leave a comment