
Welcome to Paria's “Hike of the Week” series. Each week we bring you one of the best hikes North America has to offer. Reading about a great hike is usually inspiration enough, but we hope to motivate you to get out there and see these amazing places for yourself!
This week's hike takes us to the Titcomb Basin in Wyoming's Wind River Range.
Featured Photo: Stream from Upper Titcomb Lake (photo by Robert)
Why Hike the Titcomb Basin?
The Bridger Wilderness, located within the Bridger-Teton National Forest, boasts seven out of ten of the largest glaciers outside of the State of Washington and extends for 80 miles along the breathtaking Continental Divide. The trail itself travels through dense alpine forests, wildflower meadows, and lakes. Runs of granite slabs abound too as you make your way up the trail towards views of Fremont Peak, Henderson Peak, and Gannet Peak, amongst many others.
- 28-mile out-and-back trail
- 4-day, 3-night trip
- 3,100 feet of elevation gain
- Rated as moderate to difficult
- Best time to go: late July-September
- Stunning views of the surrounding mountains carved by glaciers, including Gannett Peak, Wyoming's highest point and one of the most difficult state highpoints to reach
- The lakes are great for fishing if you're into backcountry angling (be sure to have an appropriate WY fishing license in advance, of course)
- Tons of wildlife, including bears, mule deer, gray wolves, and bighorn sheep, amongst many others
- Plenty of water sources along the trail (be sure to filter or boil it, though, as giardia and campylobacter can be found in most sources)
- Several campsites and toilets are located at the trailhead (Known as Trails End Campground)
- Paved access road makes easy travel to Elkhart Park (trailhead) and there is a large parking area located here as well
Before you pack your bags, here are a few things to keep in mind:
- Grizzly bear country; be prepared (proper food storage bags, bear spray, etc)
- Afternoon thunderstorms are common in June and July, as well as high and swift creek crossings from snowmelt. Lightning is frequent enough in the high country that the area's website cautions against being out in open areas, especially at the passes and peaks.
- “The Winds” has its name for good reason, especially above the treeline
- Can snow any time of year, especially in the higher elevations
- Speaking of elevation, this trail is located in a high elevation area, around 10,000ft. Take care to acclimate yourself to the high altitude before setting out.
- One of, if not the, most popular trails in the area
How do I get there?
If you will be flying in, Jackson Hole Airport is the closest airfield to the trailhead at Elkhart Park. From there, head east on Airport Road and turn right onto US-191 S. Continue for 22 miles. At the traffic circle, take the second exit onto US-189 S and continue for 64 miles. Turn left onto Fremont Lake Road and continue for 3 miles before the road turns into Skyline Drive. Follow it for 11.4 more miles and the trailhead parking lot will be on your right shortly after the ranger station.
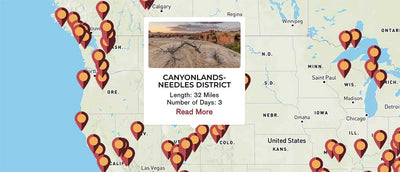
Map of Recommended Route
The following map outlines our recommended route. Click the "Load Interactive Map" button to load the correct map. Once loaded, you can navigate along the route and view recommended camp sites.
For even more detailed mapping, including being able to print a copy for yourself, click the "Open in CalTopo" button at the top of the map once it's loaded into view.
- Day 1: Island Lake (11.5 miles)
- Day 2: Island Lake Night #2 - Exploring the Titcomb Basin
- Day 3: Hobbs Lake (5.2 miles)
- Day 4: Pole Creek Trailhead (6.5 miles)
Trail Description
Day 1 - Island Lake
From the Pole Creek Trailhead at Elkhart Park, you'll start your journey by gradually ascending the first 4 miles. Pine forests will greet you, eventually giving way to interspersed meadows between the stretches of alpine forest. If you're lucky, you may find these areas full of wildflowers at the right time of year. Soon you'll come to your first junction near Miller Lake and continue left on to Photographer's Point, which is about 4.5 miles in. This is a great place to take a break and, of course, take some awesome pictures of the once-in-a-lifetime backdrop of the northern Wind River Range.
You'll finally start descending after this point towards Eklund Lake, where you'll again make a left and continue towards Seneca Lake. Pass by two more noteworthy lakes, Barbara and Hobbs, on your descent as you pass through old-growth pine forest. Enjoy the downhill trekking while it lasts past smaller ponds and more meadows before making a steep climb up to Seneca Lake, which is about 8.5 miles from the trailhead.
Continue north along the steep, rocky shore, eventually passing by more lakes, including Little Seneca Lake. Just past here you will continue left, yet again, toward Island Lake. Things get a bit more challenging here as you ascend a small pass and then an even steeper climb up another one. From here you'll cross a saddle before being rewarded with increasingly magnificent views of the surrounding peaks as well as more wildflower meadows before reaching Island Lake. This will be your home for the first and second nights and is about 11.5 miles from the trailhead.
Day 2 - Explore Titcomb Basin
Spend your second day exploring the splendor of the Titcomb Basin and the amazing views it offers. From camp, continue north on the Titcomb Basin Trail, enjoying more meadows and ponds along the way. At the fork one mile north of Island Lake, take another left, unless you are planning to attempt climbing Fremont Peak, in which case you would want to head right towards Indian Pass. After another mile, you will finally reach the basin. You're only two miles from camp at this point, so spend the day exploring the numerous lakes in the area, including both the upper and lower Titcomb Lakes and a short side trip to Mistake Lake, or just hang out and enjoy the surrounding beauty. When you're ready to call it a day, head back the way you came to your Island Lake campsite.
Day 3 - Hobbs Lake
Enjoy a more relaxed pace on your third day the short 5.2 miles back to Hobbs Lake, where you will spend the night. Travel 6.5 miles back to the Elkhart Park trailhead on your final day.
What will I need?
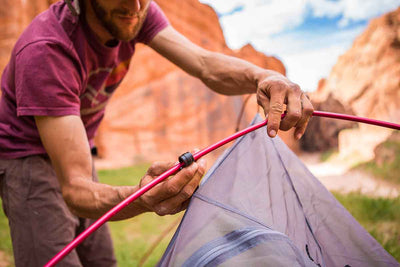
Naturally, you will want to take a lightweight, but sturdy tent to protect you from the elements at night.
According to the Forest Service website, “Summertime highs fall between 65-85 degrees and lows are usually around 30-40. Expect cooler temperatures after August.” With that being said, a toasty down sleeping bag is a must. Don't forget your sleeping pad too!
Some lightweight trekking poles may come in handy for creek crossings and make ascents easier. With the possibility of snow year-round, you might also want to make sure to bring some snow baskets for your poles just in case.
If you don't own one already, titanium cooking pots are a worthwhile investment. They're extremely lightweight and last much longer than regular camping cookware.
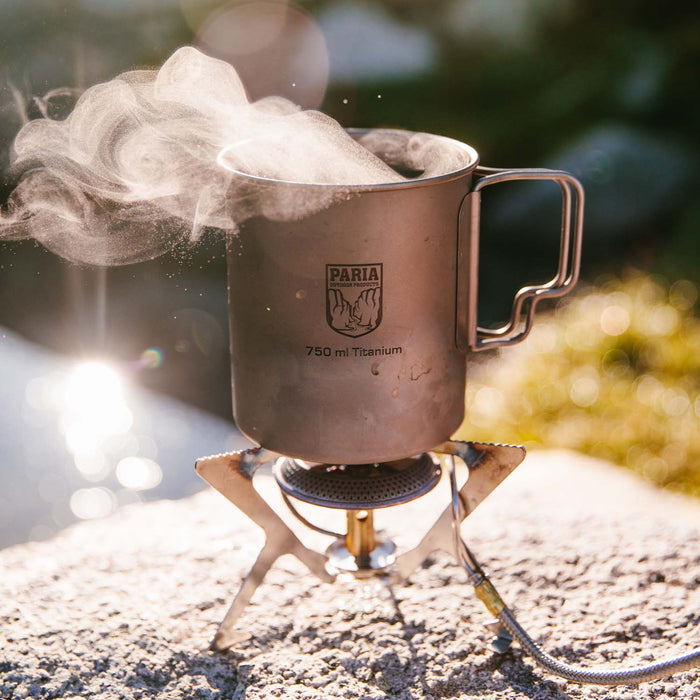
Titanium cooking pots are great for backpacking. They're ultralight, but extremely durable.
Being in bear country, you will need some form of protection for your food and scented items at night. (Small rodents, such as pika, are a real concern too!) Be sure to acquire a bear bag or canister before your trip.
If there's anything else you need to complete your pack, visit our full line of high-quality, affordable backpacking gear.
Shop Backpacking Tents
Shop Ultralight Tarps
Shop Backpacking Quilts
Shop Down Sleeping Bags
Shop Insulated Sleeping Pads
Shop Backpacking Pillow
Shop Folding Trekking Poles
Shop Titanium Cookware
Shop Tent and Tarp Accessories
Finally, to make sure you don't forget something at home, use our Ultimate Backpacker's Packing List. It even includes a convenient printable checklist!
Do I need a permit?
No permits are required for backcountry camping in the Titcomb Basin area. Speaking of legalities, though, it should be noted that campfires are not permitted at Island Lake and above.
Resources
Bridger Wilderness (Forest Service)
Titcomb Basin Backpacking Guide
For the best views of the stunning Wind River Range in Wyoming, you don't want to miss out on a hike along the Titcomb Basin Trail. Have you hiked this trail or any others in the area? We'd love to hear about your trip in the comments below!
Read Next
If you're looking for more hike ideas, read our "Best Backpacking Trips in the Rocky Mountains" roundup post. Also, the following Hike of the Week articles cover other great trips in the Rockies.
Hike of the Week: The Beaten Path
Hike of the Week: Sky Rim Loop
Hike of the Week: Teton Crest Trail
For even more amazing backpacking trips visit The Trailhead, our interactive hike map. It contains a curated list of dozens of hikes, each with a detailed writeup like this one.

Finally, check out our comprehensive list of backpacking articles that cover just about everything there is to know about backpacking. If you're just starting out, our Backpacking 101 section covers all the basics. If you already have a few trips under your belt, you can find more advanced topics covered in our Expert Articles.


Love this area! It’s a gem and makes for a great last minute trip given there is no need for permits. Just thought I would share my report on the route in case anyone is interested in seeing more pictures: https://backpackers-review.com/trip-reports/titcomb-basin-wind-river-range/
Incredible views! I am already planning my next trip and thanks to this post I believe I have found it!
Thanks!
Leave a comment