
Welcome to Paria's “Hike of the Week” series. Each week we bring you one of the best hikes North America has to offer. Reading about a great hike is usually inspiration enough, but we hope to motivate you to get out there and see these amazing places for yourself!
This week we're highlighting the infamous Rim-to-Rim Trail in Arizona's Grand Canyon National Park.
Featured Photo: Grand Canyon North Rim (photo by Anna Irene)
Why this Hike?
From steep, rocky exposed trails to shady oases to the sandy beaches of the Colorado River, this trail will make you work to explore its unique beauty. You'll descend 6,000 feet from the North Rim before returning 4,500 feet up to the South Rim. This epic, once-in-a-lifetime hike requires advance training and planning, but is totally worth the challenge!
- 23-miles; 3-day, 2-night trip
- 5,150 feet of elevation gain
- Rated as extremely difficult
- Perhaps not the most ideal time to go in the middle of the hot, desert summers, but the North Rim facilities and road are only open from mid-May to mid-October. With that being said, you can go any time of year so long as you have a permit. You will have to find an alternate route at the beginning (North Rim) if you choose to come during non-peak times.
- What you'll see: Ribbon Falls, Colorado River, colorful canyon walls, Supai Tunnel, and Roaring Springs
- Several rest houses and campgrounds can be found along the way
- Wildlife to watch for: Coyotes, cougars, foxes, falcons, hawks, gila monsters, rattlesnakes, and much more
- Common plant life includes various species of willow, honey mesquite, catclaw acacia, and saltcedar
Before you pack your bags, here are a few things to keep in mind:
- Though there are many water sources along the way, they aren't always available. Be sure to take extra water (a 3L water reservoir would be wise). Snacking often is also recommended.
- Advanced planning is required to secure permits for this hike. (See more information later in the article)
- It would also be wise to train in advance for this hike. It's difficulty has been compared to that of climbing Mt. Whitney. Less than one percent of annual visitors who attempt the Rim-to-Rim hike complete it.
- Get an early start to avoid the hottest parts of the day.
How do I get there?
There are several different ways you could go about getting to Grand Canyon NP. For our purposes, we'll assume you will be driving a car to the South Rim and taking the shuttle to the North Rim to start your hike.
From Flagstaff Pulliam Airport, get on I-17 N and follow it for 2.2 miles. Take exit 340B onto I-40 W, continuing for 29.6 miles. Take exit 165, turning right onto AZ 64 N. Continue north for 54.8 miles. Turn left onto Center Road, continuing 6.9 miles into Grand Canyon Village. Drive time is approximately 1.5 hours from the airport.
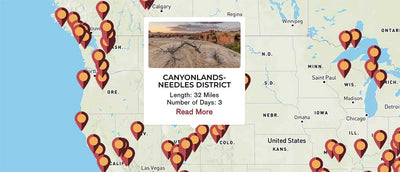
Map
The following map outlines our recommended route. For more detailed mapping, including being able to print a copy for yourself, we recommend opening the map in CalTopo.
We recommend a 3-day, 2-night trip to enjoy all that the area has to offer.
- Day 1: North Kaibab Trailhead to Cottonwood Camp (6.5 miles)
- Day 2: Cottonwood Camp to Bright Angel Campground (6.5 miles)
- Day 3: Bright Angel Campground to South Rim/Grand Canyon Village (9.7 miles)
Trail Description
Don't let the low miles on the first day's trek fool you. You'll be descending almost a mile (over 4,000ft) over the course of the day. Beginning from the North Kaibab Trailhead at the North Rim, head south towards the Supai Tunnel (about 2 miles in). This neat rock feature seems to separate the evergreen forest you start in from the desert landscape laid before you. After another 2 miles, you will reach Roaring Springs, where you may be able to top off your water supply or just enjoy a break otherwise. Cottonwood Campground, your first-night stay, is only about a mile further and you can enjoy cooling off in nearby Bright Angel Creek.
Your second day may feel like a bit of a break after the first and before your grueling ascent back up to the South Rim on your third day. You won't be losing nearly as much elevation, but an area known as “The Box” can present its own set of challenges. Although you'll have plenty of time to reach your next destination of Bright Angel Campground, it's best to get an early start to avoid the oppressive afternoon heat of “The Box”, a portion of the trail that runs through a rather deep canyon. Other than that, it's relatively smooth sailing on day 2. The campground has running water and sinks, so you'll have a chance to clean up. You can also stop for a drink or lunch at Phantom Ranch, which you will pass on your way to the campground. And if that doesn't sound enticing enough, there is also a beach at the nearby Colorado River!
Again, be sure to get an early start on day 3. (It is recommended to avoid hiking between 10am and 4pm, the hottest part of the day.) After crossing over the Silver Bridge over the Colorado, begin up the Bright Angel Trail towards Indian Garden, one of the highlights of the trail. Along the way, you'll traverse through Pipe Creek Canyon and another infamous area known as “The Corkscrew”, a strenuous series of switchbacks, before arriving atop the Tonto Plateau and reaching Indian Garden. This is a great place to rest in the shade and fill up on water again from the nearby creek before finishing your rim-to-rim trek.
What will I need?
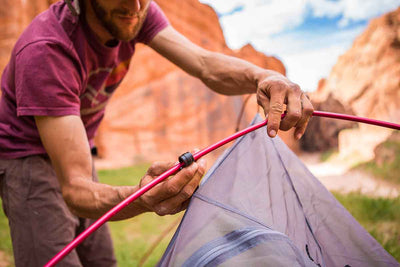
The last thing you want on a trip like this is a tent that's bulky, heavy, and difficult to put together at the end of a tiresome day. Go for a lightweight tent that you can put together in minutes!
During the peak months between May and October, lows average between 58 and 77°F. Obviously, you're probably not going to want a heavy-duty sleeping bag during the hottest months. Down quilts are versatile enough to keep you warm on those chilly nights, but allow you some freedom of movement (namely your feet out of the bottom of the quilt!) on the stuffy nights. And, no matter what you're using to cover up with, don't forget your sleeping pad!
Just because you're roughing it doesn't mean you can't enjoy a few comforts. How about an inflatable seat that weighs next to nothing to avoid the uncomfortable desert terrain?
Small, lightweight, inflatable sit pads are great for backpacking, especially after a long, grueling day on the trail.

Between the rocky path and all of the climbing and descending you'll be doing, some folding trekking poles will definitely come in handy. Plus, you can easily pack them down and store them on your bag when you don't need them.
It's worth mentioning again that an extra large water bladder is highly recommended for this trip. Instead of a one or two liter one that you would normally take, look for one that holds at least three liters.
For a comprehensive list of what to pack for your trip, be sure to check out our Ultimate Backpacker's Packing List. It even includes a convenient printable checklist!
Do I need a permit?
Yes, and the earlier you apply for one, the better! Permits are $10 “plus $8 per person per night camped below the rim.” For more information on obtaining permits, visit the NPS page.
Resources
Backcountry Updates
North Rim Campground Info
Phantom Ranch Lottery Info
Trans-Canyon Shuttle
If you're looking for one of the most challenging hikes in the desert southwest, you can't go wrong with the Grand Canyon's Rim-to-Rim Trail. Have you hiked this trail? What other awesomely challenging hikes have you been on? We'd love to hear in the comments section below!


Leave a comment